Monday, August 29, 2011

Modjeski says Yes! to 6DJ8 for audio

I'm finding this to be very interesting reading.


Modjeski has been looking at tubes for a long time, admits he made some mistakes, but likes the 6DJ8 (actually, russian 6922 because they are the real thing) for line level audio, argues they are more linear in actual use due to high Gm, work nicely in cascades with much higher bandwidth than 12AX7, stay away from high specified dissipation specified and they last well.

And he tells an interesting story, making a lot of points I had never thought of, best explanation of Gm and mu and why Gm is more important, can't trust published curves, etc.

Saturday, August 27, 2011

Belkin Chassis Noise

Unfortunately, even when merely plugged in, the Belkin is generating noticeable chassis hum.  It seems to consist primarily of 60Hz and 240Hz.  Perhaps the kitchen at 240Hz.

I tried putting a damped metal plate on top and it only decreased the level at 240Hz by about 1dB.  But putting an oversized piece of 3/4" plywood dropped hum by more than 3dB, from 27.6 to 24.3dB.  I'm using RTA app on iPhone to make these measurements.  A Weighted SPL is more or less at residual either way.

It seemed to be best if I covered entire top of Belkin with slight overhang on both sides, especially on air intake vent side.  Moving toward the wall but uncovering back was worse by about 1dB.

The Belkin manual warns about leaving 1" of space on all sides, but says nothing about the top (which has no vent holes).

Funny that the Belkin in living room on dedicated outlet seems quieter, but that could result from the stack of equipment on top, or the position in the room, or different room modes in the room.

Refrigerator or A/C make enough noise that the hum is not noticeable when they are running, though the refrigerator also shows big (bigger) spike at 240Hz.

Also, when cable box is plugged it, possibly not even "on", it makes more noise than Belkin, can't even tell Belkin is making noise.

It is seeming to me that the old MonsterPower 2000 strip *also* made some hum, that seems to be a property of all line filters that use inductors (need to retest this).

It is also seeming to me that both TV and cable box are quieter with Belkin than they were with MonsterPower 2000, but this is nothing like a controlled comparison, and I was mostly running Sony also.

I'm concluding that the low level hum is not important now that I am damping it down with big piece of particleboard on the surface of the Belkin, and the particleboard top is also nice for putting power strips on.

Noise Sniffer tests

To see how well the Belkin was reducing electrical line noise, I used my AudioPrism noise sniffer.  The most quantitative way to use it is to set knob straight up (half way) because it seems to change the most that way, and then use SPL meter to measure level.

Testing new kitchen Pass & Seymour outlet, I discovered:

1) Noise at P&S outlet goes down when Belkin is plugged in but not turned on.  When Belkin is turned on it is about the same. as not being plugged in.
2) Noise at belkin outlets is the same as noise at P&S (!)
3) Noise level of this circut is very low, that's why (SPL is 73.3dB).  I get the same reading on dedicated AV outlet in the living room when not playing anything there.  In contrast, the outlet by the refrigerator is fairly noisy when refrigerator is running, and the outlet near the front door (powering security lights at front and back of house) is very noisy.  Outlet in bedroom is only slightly noisier than dedicated AV outlet despite computers and stuff on the same circuit (computers are plugged into APC UPS).


Thursday, August 25, 2011

Electrician on Monday

TJ Jones (the son) of John Jones Electric, my preferred electrical contractor, came out and did great electrical work on Monday.

The first priority, the Pass & Seymour 5262-A outlet was installed.  He said it was better if you did not remove the outlet screws, fortunately he could use the two remaining untouched screws since this outlet was at the end of the circuit.  He made a wire hook and slid it under the cover and tightened very tightly.  Making the right sized hook takes someone with knack like a professional electrician.  I chose to have him use an oversized Nylon unbreakable outlet cover with thermal insulator underneath.  The result, shown above, is a beautifully functional outlet.  The white plate matches the wall nicely.  The whole thing doesn't need to look fancy because it is normally under the table.


The second priority was the installation of the security camera facing gate and fence on north side of house.  He said it was better if outlet box was installed with plate screws attaching to that (unlike the way cable guys just drill hole in wall) so he did that.  (In retrospect, I'm not so sure, a small hole in the wall might have been better in terms of thermal performance, the box required a large square hole in the interior wall.)  The camera was mounted on the exterior wall at the same position as the box (in fact, a conduit sized hole, which looked larger than necessary, was drilled from the inside to be sure it lined up. The Swann 580 camera was then mounted on the exterior wall with provided screws and anchors.  The electrician felt the gasket on the camera mounting bracket sealed sufficiently tightly to the wall, and caulk sealent would just mess it up.  There was a hole in the gasket (for when not running the wire through hole in back) which was pointed downwards, which he said was a good idea for draining off any accumulated moisture.  Also, the camera is mounted high and not far below the eaves, providing further protection from rain infiltration.  A cable plate was chosen for the inside with the camera wires run one by one through the hole.  Another thermal insulating pad was used, the blank kind with hole punched through the middle.  The creation of the inside hole released a lot of sheetrock which he (mostly) vacuumed up.


The third priority was the installation of a GFCI outlet to provide GFCI for all kitchen outlets.  He guessed the first outlet in sequence was one of the two on either side of the sink.  His hunch was that it was the one on the left side of the sink, but he started by cutting the leads to the outlet on the right side of the sink.  Then he got a shock from that outlet because it turned out it was not even on the same circuit as the other outlets, apparently it is on the Refrigerator circuit.  The correct outlet then turned out to be the outlet on the left side, as his hunch had told him.  He installed a nice Cooper GFCI outlet (which he provided) with a synthetic stone outlet cover (gold color) which I provided.  To replace the outlet on the right side, I provided a Hubbel industrial outlet (which some audiophiles use but IMO are no where near as good as the Pass & Seymour version). and another synthetic stone cover in slightly different color (Travertine).  I only remembered they were different colors afterwards.  I would have gotten Travertine for both, but the were not in stock for both Decora and traditional outlets at the Home Depot I went to a few days before.  Anyway, the two colors are very similar and the outlets are widely spaced with the gold one in a shadow so you probably wouldn't notice the difference until after being told of it.

He suggested that although the code now requires all GFCI in kitchen, it generally wasn't a good idea to put GFCI on refrigerator circuit because GFCI could trip while you were on vacation and then you would come home to spoiled food.  But I wonder now if GFCI outlet couldn't be used putting refrigerator on non-GFCI branch.

I got estimates for both the installation of the new security lamp on the north side and a dedicated audio circuit for the master bedroom.  Both looked reasonable but he didn't have time to do them right then.  Actually I may add  some additional details, such as isolated ground, 10G wire, and indoor switches for the north and south side security lamps.

After TJ left, I first decided the new Hubbel outlet cover didn't look exactly straight, so I loosened the screw and straightened it.  Subjective judgement was required because when I put the outlet cover perfectly straight it simply showed how everything else wasn't straight.  A particular compromise position made everything look right to my eyes.  I tighted the cover screw very tight to get it straight also, though I'm a little worried I tightened it too tight the cover being stone didn't crack like cheap plastic might have.

Then I thought the security camera wire plate didn't look right either.  There was a visible hole above the cover, and there was also a gap along the side.  I tried simply tightening the cover but that didn't help the gap, so I loosened the cover and scraped the bumps off the sheetrock (my interior sheetrock has those faux plaster bumps which I hate) and that made it possible to tighten the cover nicely with no visible gap.  Then I used white caulk to cover the hole on top.  The result looks perfect, and also eases my concerns about sheetrock silica being blown through into the kitchen air (the A/C airflow can be felt blowing in that general area).  I also discovered TJ had left a bit of sheetrock dust on the cabinet top (though he had used his dust buster on it, he hadn't done perfect job), rest of cabinet, and a lot of sheetrock dust on floor.  I vacuumed it all up perfectionistically.

All in all I think TJ did great work and I was grateful to get him to install the camera at all (he might have simply refused if he had been like my plumber).  But I didn't think he was quite as perfectionistic as his father John.  I've never found that I needed to do any cleanup or anything after John, who always seems to have a better eye for slight defects and messes than I do.

Thursday, August 18, 2011

Trouble installing Pass & Seymour 5262-A outlet

After several frustrating and backbreaking hours trying to install this outlet while crouching under the table, I've decided to get an electrician to do it.  I've booked my favorite electrician (the best contractor of any kind I know right now) to do it.  The earliest he is available on Monday, which now makes it impossible for me to complete the under table redesign before the end of the following weekend.

Unlike any other outlet I've ever seen, the 5262-A has a wire cage design; beneath the hot and neutral terminals there is a pressed metal cover that is apparently intended to go on the outside of the wires, so each wire is trapped in between a brass plate on the side of the outlet body the cover.  In a typical outlet, a terminal screw holds each wire down.  But the the screw doesn't provide as good contact as the wire cover, it tends to pull on the wire when it is tightened, and if the screw becomes loose over time the wire can pull out.

In this and every other way, the 5262-A is the most robust electrical outlet I've ever seen, and fully deserved selection as "the best" by the late and legendary Bob Crump.  Unfortunately it is not longer in production.

But the wire cage is an obstacle to installation for nonpro electrical installers like me.  How are you supposed to get a 14G solid wire in there?  Possibly if you could curve the wire with just the right curve beforehand, you could do it.  But unlike most outlets, you cannot simply wrap the wire around the terminal and force the wire into place (a crude but effective method usually, though sometimes small chinks of plastic break off the outlet, so it doesn't exactly seem that is the correct method.

Another method might be to remove the screw terminal first. then wrap the wire around the screw, then put the wire cover under the screw and screw the entire assembly (wire, cover, screw) down in the outlet.  That's what I finally attempted to do.

But nobody has ever told me that you could reversibly remove the terminal screws from an electrical outlet.  As you turn the screw towards out, it sticks rather hard, as if it's not supposed to be turned anymore, so I've never done that before.  I was a little worried about doing things this way without official instructions (no instructions were included with my NOS P&S outlets).

Whether the removing-the-screw-first technique is AOK or not, it's not easy to get the screw back in.  I was able to do this on the hot side, but many attempts to get the neutral screw back in failed.  I somewhat damaged the screw cap and may also have damaged some of the screw threads in the process.  It was at that point I decided I needed a pro to do this.  A pro could probably do this all in a few minutes without damaging the threads.  Fortunately the outlet has two sets of screws, and I have not messed with the lower set.

A friend of mine did not want me installing electrical outlet anyway.  I told her I'm extremely careful about everything and I've done it before thirteen times.  Actually, I think I'd done it about a dozen times, this being the thirteenth.

I feel bad about not being able to finish the under-table rework during my vacation.  But there was another iffy part also.  Installing the new security camera will require a hole in the upper back corner of the kitchen.  That location is completely inaccessible by ladder without removing the satellite TV box, and probably the rest of the under-table stuff as well.  So, if I had gotten everything set up without getting the camera in place, I'd simply have to remove everything all over again.

And getting the camera installed posed some additional challenges.  A through-wall hole is required, and I am loathe to do those.  I'm always worried about hitting electrical lines with my drill.  And my 6' ladder, which I'd need to use on the outside while mounting camera (though a taller ladder would be better) is especially wobbly.  And I'm still using a rental car which is not a hatchback, so it's not easy to buy and bring home a new 6' ladder.  I was hoping I'd get my car back from the shop on time to buy a new ladder and do the camera install before the end of the weekend.  But it's already Thursday and no word about picking up my car yet.

Even if I got a new ladder, the 6' really wouldn't be tall enough, though it's the biggest I can get into hatchback, and I was wondering if I'd actually be able to do the camera install myself.  I was thinking it wouldn't be a bad idea to get electrician to do that.  There are many issues, such as sealing the outside, getting a nice wall cover set up on the inside, etc, any one of which looked like it might be very difficult for me to do.

So now I'm hoping to get my electrician do these two things, both camera install AND new outlet, both of which would really need to be done before getting everything set up again.  And it's probably all for the best that things have worked out this way, even if not following plan and my projected completion date slips.

Monday, August 15, 2011

Power cords

No, not superfancy audiophile cords, I don't much get into that.  I have too many things to power to spend much money per cord.

But nicely made SJT power cords (SJT is heavy duty, SVT is medium duty), in many different lengths, with 14 gauge conductors.

http://www.stayonline.com/5-15-c13-15-amp-power-cords.aspx

I've bought these before, they're nice, and it's very nice to have exact length you need.  Brick and mortar stores only seem to stock one size, I believe it's something like 6 feet.  Use that, and if you're powering a dozen things, you'll end up with big piles of excess cord.

The plug specifications are NEMA 5-15, and the equipment connector is IEC C13.  To do effective internet search, you need to use those specifications, even though just about every piece of equipment sold in the USA uses these for detachable cords.  5-15 is sometimes specified as 5-15P (plug).

If they had shielded or 12g I might get that, but they don't offer it.  Shielding in power cord is not always a win.  Mainly it is for protecting other equipment from the noisy power and current delivery, so it would be most useful if you were running power cord with other cables or near sensitive equipment like moving coil preamplifier.  On the floor, it doesn't much matter.

Reworking the wiring and equpment beneath the kitchen table

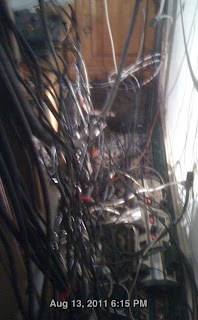
 I'm taking vacation this week to rework the wiring beneath the kitchen table.  This entry is the "before" pictures.  In the above "close up" picture you just might be able to see the very thin white translucent plastic fiber optic cable that has gotten wrapped around everything, making it impossible to move anything because I don't want to break it, it's nearly unobtanium now and could cost hundreds of dollars to replace.  It's the essential link which digitally connects kitchen and living room video.  (BTW, it's OWLink HDMI over fiber optics cable).  The picture below gives a larger view of the complexity I need to tackle.


The photo below is the "large" equipment under the table, about 18 inches forward from where I actually sit.  The equipment consists of a DVDO scan converter which I use to convert analog video signals to digital (actually DVI) for distribution through the house.  Also there is an HDMI switch, which selects which HDMI input to distribute.  And there is a Radio Shack remote extender (the black plastic pyramid) which controls the HDMI selector from anywhere in house.  On top in front is a Koenig adapter which will convert DVI+Audio into HDMI, that hasn't been hooked up yet and I decided to forgo hookup until after the rework project.  The Jensen Isomax transformer (notice white and red audio connections) is not actually being used here and will be used elsewhere after removal.  In back is an active HDMI 4 way splitter and distribution amplifier.  Two of its outputs go to OWLink fiber optic senders.  Believe it or not, the HDMI video selection and distribution has been wonderfully perfect and reliable.  You may notice the legs for a 17 inch stool.  Atop the stool is the scanner and printer for my kitchen computer.  The stool is going to be replaced with a small table I plan to build this week.

The picture below is the side view from behind my AV equipment rack to the side of the kitchen table.  The mind boggling wires hanging down and interconnecting equipment in the rack will not be reworked much this week.  But on the floor toward the back you can see the Monster Power outlet strip which will be replaced with the Belkin UPS Power Conditioner.  And in close up, you might be able to see the thin white fiber optic cable that has gotten wrapped around all the power connections as well.


Monday, August 1, 2011